FaceTime is great, but it isn’t so great when the Self-View Window stays large. I was trying to contact a good friend of mine on my iPhone 15 Pro, and instead of seeing their wonderful smile, the only thing prominent on the screen was my slobbering face. Instead of going blind or terminating the friendship out of embarrassment, I decided fixing the FaceTime problem was easier. Let’s take a look.
How To Fix FaceTime Self-View Window Stays Large
Folks across the internet seem to be having an issue with FaceTime wherein the self-view window is far larger than the window containing the individual with whom they are conversing. While performing a software update is likely to fix the issue, let’s take a look at some hands-on solutions.
1. Force Restart Your iPhone
Though some users are reporting that simply ending the call and trying again does the trick, many users are also replying that this provides, at best, a temporary fix. Users are also reporting that performing a force restart solves the problem, but for some, this is also just a temporary solution.
Here’s how to do it:
Press and quickly release the Volume Up button.
Press and quickly release the Volume Down button.
Press then hold the Side button.
When the Apple logo appears release the side button.
However, knowing how to perform a force reset will be useful for the solutions below, so keep this in mind.
2. Disable Automatic Prominence in FaceTime
Automatic Prominence is a feature that allows whoever is speaking to have the majority of the screen. While this typically only comes about during group calls, it’s possible that this feature is causing problems during a one-on-one call. If disabling this feature doesn’t solve the problem, turning it back on is rather easy.
Time needed: 1 minute
To disable this FaceTime feature:
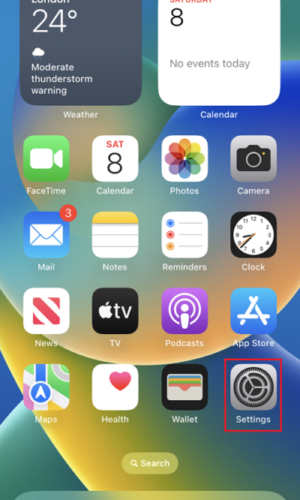
From your iPhone, go to Settings.
Scroll down and select FaceTime.
Look for the Automatic Prominence section by scrolling down. Underneath this section, disable Speaking.
It’s a good idea to restart/force reset your iPhone after disabling Automatic Prominence.
3. Reset FaceTime and Restart iPhone
It may just be that you need to turn off FaceTime, restart your device, and then enable FaceTime again.
Navigate to Settings.
Select FaceTime.
Find FaceTime just below Announce Calls and disable it.
Reset your device.
Go back to Settings > FaceTime and turn it on again.
4. Disable Zoom Accessibility Settings
Another thing you can try is disabling your Zoom settings within Accessibility. This one is also really easy, and reverting it just entails following the same steps again. You may also want to restart your iPhone after completing the process.
Navigate to Settings.
Tap Accessibility.
Look to see if Zoom is enabled at the top. Disable it if it is on.
You may also want to look at your Zoom Controller settings. Check to make sure it is not on by accident.
Hopefully one of these solutions allows you to view the things that matter to you. Being able to properly access FaceTime can be incredibly important, so make sure it’s running the way you want. You may also want to know what to do if FaceTime isn’t working after the iOS 17.4.1 update.
The Mac Observer


