Group chats are highly effective when conveying information to several people simultaneously. And with the Messages app on iPhone and iPad, you can easily create SMS and MMS group chats. However, if your group members use Apple devices, you can use Apple’s exclusive features by creating an iMessage group chat instead.
When creating iMessage group chats, you can add up to 32 people, yourself included, and your messages will appear in blue bubbles. However, you need more than 3 participants added to the group to access certain iMessage group chat features, like the ability to leave or remove someone from the group chat. So, without further ado, let’s get right into it.
How to Make a Group Chat on iMessage
The process of making a group chat on iMessage is similar to sending a message. The only difference is the number of contacts you send the message to. Here, you must send the message to two or more contacts simultaneously for iMessage to recognize it as a group chat. Follow the below steps to do it.
Step 1: Open the Messages app.
Step 2: In the top-right corner, tap on the Compose icon.
Step 3: Now, tap on the To search bar.
Step 4: Type the contacts’ names you wish to add to the group chat and select them from the search results.
Step 5: Once you add two or more contacts, use the message bar to type a message.
Step 6: Then tap the send icon.
Once the message has been sent, it will automatically make it a group chat on your iPhone or iPad.
What Can You Do on iMessage Group Chats
Once you have created a group chat on iMessage, you get native options to ensure your message is not lost in the sea of participants. This includes the ability to react to messages within the group chat, send inline replies or start threads on any particular message, and even tag specific contacts in the message line.
Keep reading to know how to do it using the Messages app on your iPhone or iPad.
Tip: Check out our other article on how you can create and use stickers with iMessage.
1. React to Messages
Step 1: Open the Messages app and tap on the relevant group chat.
Step 2: Here, long-press on the message you want to react to.
Step 3: Tap on the relevant reaction.
This will instantly add your reaction on top of the message in the group chat. You can also check our explainer to know more about emphasized reactions on iPhone.
2. Send Inline Replies or Threads
Step 1: Open the Messages app and tap on the group chat.
Step 2: Now, long-press on the relevant message.
Step 3: Once the options appear, choose Reply.
Step 4: Now, use the message bar to type your direct reply and tap on the send icon.
This will directly send your reply to the selected message. Additionally, sending more than two replies to the same message will create a reply thread within the group chat. Here’s how you can access it.
Step 5: Beneath the selected message, tap on the Replies option.
Step 6: See the reply thread for that message.
3. Mention People in Messages
Step 1: Open the Messages app on your device.
Step 2: Here, tap on the relevant group chat.
Step 3: In the text box, type @ followed by the contact name to which you wish to send the message. Ensure they’re added to the group chat.
Step 4: Once the contact card appears in the suggestions, tap on it.
Step 5: Now, type your message and tap on send.
This will specifically tag the selected contact when sending the message in the group chat.
While group chats are an excellent way to get the gang together, you might cause some friction if you forget to add someone. In this case, you can always add the contact separately after creating the group chat. Similarly, you also get the option of removing any unwanted contacts.
So, follow the below steps to add or remove a contact from an iMessage group chat.
Note: Other group participants will get notifications when you add or remove a contact. Additionally, the added contact can’t see the previous group conversations.
Step 1: Open the Messages app and tap on the relevant group chat.
Step 2: Here, tap on the group name or icon.
Step 3: Now, tap on the currently added contacts.
Step 4: Once the options expand, tap on Add Contact.
Step 5: In the search bar, type the name of the contact you wish to add and tap on it from the search results.
Note: Make sure the contacts you add appear in blue.
Step 6: Repeat the above process for adding any other contacts.
Step 7: Tap on Done.
This will close the add window and add the selected contacts to your iMessage group chat.
Step 1: Open the Messages app and go to the relevant group chat.
Step 2: Here, tap on the group name or icon to open group information.
Step 3: Tap on the contacts option to see all the added contacts.
Step 4: Go to the contact you wish to remove. Now, hold and swipe left until the Remove option appears.
Step 5: Then, tap on Remove.
The selected contact will now be removed. While they can’t send messages to the group chat, they can still see the group messages followed by a ‘You left the conversation’ message.
How to Customize a Group Chat on iMessage
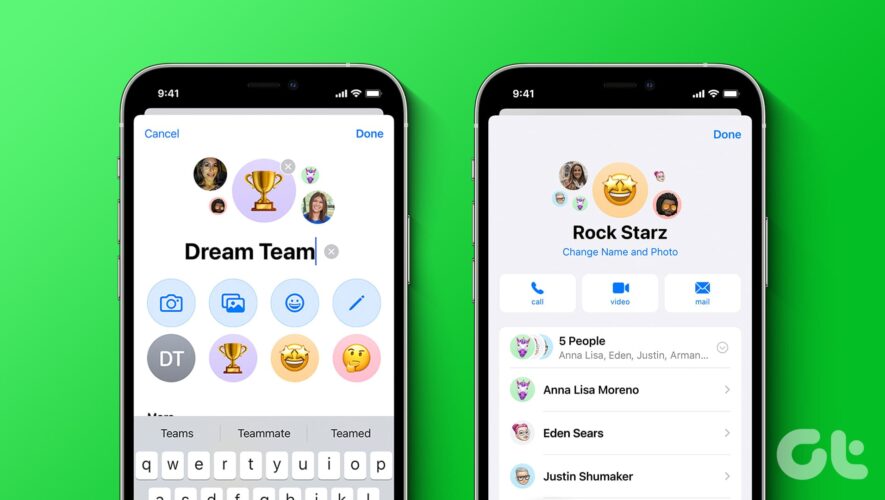
Besides creating a group chat on iMessage, you can customize it per your preferences. This includes the ability to change the group name and the group picture. Once done, it can help the group chat stand out from the rest. Here’s how to do it.
Step 1: Open the Messages app and tap on the group chat.
Step 2: Then, tap on the group name or icon.
Step 3: Here, tap on ‘Change Name and Photo’.
Step 4: First, tap on the group name and change it as per your preference.
Step 5: Then, scroll through the page and select any group icon options. You also get the option of uploading images or taking a new one.
Step 6: Edit the selected image using the menu options and tap Done.
Step 7: Once all the relevant changes have been made, tap Done.
This will close the customization window and change the iMessage group chat picture and name. Notifications regarding the change of the group icon and name will also be sent in the group chat accordingly.
How to Mute Group Chat on iMessage
If you have been added to a group chat with three or fewer participants, the option to leave the group will not be visible. In this case, you can mute the group notifications. Here’s how to do it.
Step 1: Open the Message app on your device.
Step 2: Now, tap on the group chat you wish to mute.
Step 3: Then, tap on the group name or icon.
Step 4: Scroll down and toggle on Hide Alerts.
This will mute the notifications for the selected group chat on your device.
Leave iMessage Group Chat
If your group chat on iMessage has more than three members, you can follow the below steps to leave it.
Step 1: Open the Messages app and tap on the relevant group chat.
Step 2: Tap on the group name or icon.
Step 3: Here, tap on ‘Leave this Conversation’.
If prompted, again tap on ‘Leave this Conversation’ to confirm. This will allow you to leave the group chat on iMessage.
Also Read: How to block spam group chats on iPhone
FAQs for Making a Group Chat on iPhone and iPad
1. Can you leave a three-person group chat on iMessage? Your group chat must have four or more participants to activate the leave this group option. This means you can only leave a three-person group if you’re the fourth participant. Otherwise, you can mute the group until the iMessage group chat limit is met.
2. Can you add blocked contacts to the group chat on iMessage? No, you cannot add blocked contacts to group chats. So, if you cannot add someone, check and see if they’re blocked. If they indeed are, unblock the contact before adding them to your group chat on iMessage.
Get Your Friends Together
We hope this article helped you understand how to create and customize your iMessage group chat. Additionally, if you have an iPhone running iOS 17, you can access the latest iOS 17 features for iMessage.
Guiding Tech
https://www.guidingtech.com/how-to-use-imessage-group-chat/


