If you’re looking to use ChatGPT with Siri on your iPhone or Mac, there’s an easy way to do it with the Shortcuts app. Shortcuts is a powerful automation tool that comes pre-installed on iOS and macOS devices, allowing users to create custom workflows to streamline their daily routines.
Using ChatGPT with Siri on your iPhone or Mac is a simple process that can be accomplished with the Shortcuts app. With a few basic steps, you can harness the power of the OpenAI API and get quick and accurate responses to your queries. Whether you’re looking to streamline your daily routine or just have some fun with Siri, ChatGPT is a powerful tool that can help you get the most out of your iOS or macOS device.
Using pre-made shortcuts can sometimes be risky, which is why in this tutorial, we’ll explore a simple way to create your own shortcuts and customize the Openai API key to get the most accurate and efficient responses. Don’t rely on pre-made shortcuts that may not meet your specific needs – take control and create your own! With a few easy steps, you can unleash the full power of ChatGPT and get the results you want. So, let’s dive in and discover how to create a custom shortcut that is tailored to your unique requirements. Get ready to unlock the full potential of ChatGPT and take your productivity to new heights!
How to Use ChatGPT with Siri on iPhone and Mac1. Create API Key in OpenAI. First and foremost, you’ll need to create an API key to help Siri Shortcut connect with ChatGPT. To generate an API key, head over to this link and hit the "create new secret key" button. Once that’s done, make sure to store your shiny new API key in a safe place for use in the next step of this tutorial.
2. Create a new ShortcutTo get started, you’ll need to create a new shortcut within the Shortcuts app. Simply open the app and tap the "Create Shortcut" button to begin. From there, you can add a new action by selecting the "Add Action" button and searching for the "Ask for Input" action. This action will be the place to receive questions and send them to the OpenAI API.
Add Ask for Input to Shortcuts
3. Get Contents with API KeyAccording to the OpenAI API instructions, you can find more information by following this link. To connect with ChatGPT, we’ll need to use the command structure provided below, replacing YOUR_API_KEY with your actual API key from step one.
curl https://api.openai.com/v1/completions \
-H ‘Content-Type: application/json’ \
-H ‘Authorization: Bearer YOUR_API_KEY’ \
-d ‘{
"model": "text-davinci-003",
"prompt": "Say this is a test",
"max_tokens": 7,
"temperature": 0
}’
In the Shortcuts app, we have an action that can replace the need for using curl to get content for our shortcut. To find it, simply search for "Get Contents of URL" and use the URL "https://api.openai.com/v1/completions".
Get Content of URL
Next up, within the Get Contents of URL action, we’ll declare the Method as POST and include two headers as follows (note the space between "Bearer" and your API key).
Content-Type
application/json
Authorization
Bearer YOUR_API_KEY
Add Headers with ChatGPT API Code
Next up, within the Request Body section, click "Add new field" and select "Text". Then, enter the two following of API Code one after the other. It’s important to note that in the "prompt" section, we need to click "Provided Input" to connect with the first part of the shortcut.
model
text-davinci-003
prompt
Provided Input
Add Model and Prompt to Request Body
Within the Request Body section, click "Add new field" and select "Number". Then, we’ll declare the Temperature and max_tokens. The Temperature represents the accuracy of the answer from ChatGPT and is typically set to 1 by default. The max_tokens, on the other hand, determines the length of the answer generated by ChatGPT. With a max_tokens value of 2048, your answer could contain up to 1500 words!
temperature
1
max_tokens
1000
Add Temperature and max tokens API Code
We’ve conquered the toughest challenge of connecting to the ChatGPT API, and now we can dive into the exciting task of refining the content we receive from the ChatGPT API code.
4. Extract the content from ChatGPTThe next step is to filter the answers from ChatGPT through the API Key. Typically, the answer is located between the "choices" and "text" sections. Therefore, we use two actions in Shortcut: "Get Dictionary from Input" to retrieve the content from the API Code, and "Get Dictionary Value" to extract the content from the "choices" section. Then, we use the same action to retrieve the content from the "text" section. To complete this step, you just need to create actions similar to the ones shown in the image below.
Get Dictionary from Input
The last step is not mandatory, but you can add a "Show Result" action to receive the result in the Shortcuts App or to identify errors in the shortcut creation process. At this point, save your shortcut under any name you like. In this guide, we choose the name "ChatPro". And get ready to call your shortcut in the next step.
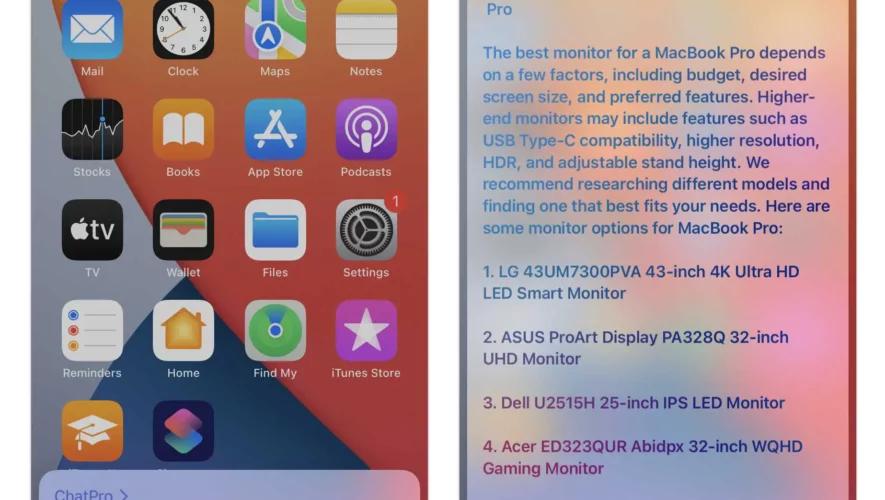
5. Use Siri to run ChatGPT Shortcuts.Using ChatGPT with Siri is quite simple. All you need to do is say "Hey Siri" followed by the name of your Shortcut, in this guide it’s "Hey Siri, ChatPro". The Shortcut will automatically run and you can ask any question you want.
ChatGPT integrated with Siri
The clear and concise tone of Siri’s voice combined with the intelligence of ChatGPT can help you complete your tasks quickly and efficiently. Whether you’re on your iPhone or Mac, using Siri Shortcut to access ChatGPT is a breeze.
The post How to Use ChatGPT with Siri on iPhone and Mac appeared first on Techsviewer.
Techsviewer
How to Create Custom Shortcuts for Using ChatGPT with Siri (iPhone and Mac)


