In this tutorial, we will show you how to activate the new Stolen Device Protection feature on your iPhone. This will protect your Apple ID, account passwords, and other critical personal information when your device is stolen or in an unfamiliar location.
Imagine you’re in a public place, and someone sees you entering your iPhone passcode. Worse, you fall victim to the sophisticated gang of thieves who use CCTV in public places and record you entering your iPhone passcode.
Once they have your passcode, all they need is to steal your iPhone. And since they already know your iPhone passcode, they can go to the Settings app and easily change your Apple ID password. Once this is done:
The thief will change the phone number and email address on your Apple ID account.
They can turn off your iPhone’s Find My Activation lock and sign in with another Apple ID. Now, this device has almost fully become theirs, and they can resell it. You won’t be able to track it, lock it, or erase it.
To protect your sensitive data from falling into the thief’s hands and deter them from doing the above, Apple has introduced the Stolen Device Protection feature.
How Stolen Device Protection further secures your data
Stolen Device Protection adds an extra layer of protection by:
Requiring biometrics authentication
Adding Security Delay
Let me explain.
1. Biometrics authentication
iPhone will require Face ID or Touch ID authentication before it gives access to sensitive data at locations that are not your home, work, or one that you frequently visit.
Secondly, when Face ID or Touch ID fails, you get the option to enter the device passcode. But with Stolen Device Protection enabled, there is no passcode alternative or fallback. Therefore, the thief cannot access the sensitive information even if they know your device passcode.
Face ID or Touch ID authentication is required to do the following when your iPhone is at an unfamiliar location:
Access your iCloud Keychain (Settings > Passwords). This ensures the thief cannot see your saved account passwords for Facebook, Twitter, Google, etc.
Use credit cards saved in Safari: They can’t use your saved payment method to make a purchase.
Turn off Find My Lost Mode: If you use another device to put your stolen iPhone in Lost Mode, the thief cannot turn off Lost Mode as it requires your Face ID or Touch ID.
Erase all content and settings: The thief cannot erase your iPhone from Settings > General > Transfer or Reset iPhone.
Apply for a new Apple Card from your account.
See your Apple Card or Apple Cash virtual card number.
Make Apple Cash or Savings transfers and other similar actions.
Use Quick Start to set up another iPhone using your iPhone and transfer your data and account settings to it.
Note:
The above things can be done if the thief holds you hostage and forces you to authenticate.
Apple Pay continues to work if you authenticate via the iPhone passcode.
2. Additional Security Delay
With Stolen Device Protection enabled, you or the thief must authenticate with Face ID or Touch ID, wait for an hour, and then authenticate again with Face ID or Touch ID before doing the following in an unfamiliar location:
Note that your iPhone may let you change the above things before the one-hour delay if you arrive back at a familiar location such as your home or office.
What you need to do first
Before you can turn on Stolen Device Protection on your iPhone, you have to ensure the following things are in order:
Update your iPhone to iOS 17.3 or later.
Your Apple ID must be using two-factor authentication (which it almost certainly is).
You must have a passcode set up on the device. Once again, I think you have likely done this. This is the same passcode you enter when you restart or unlock your iPhone.
Face ID or Touch ID must be set up.
Enable Significant Locations from iPhone Settings > Privacy & Security > Location Services > System Services > Significant Locations.
Find My must be enabled. You can check this in iPhone Settings > your Apple ID name from the top > Find My. It should say On next to Find My iPhone. Note that you cannot turn off Find My iPhone while Stolen Device Protection is active.
Once you have checked that the above requirements are fulfilled, here’s how to enable Stolen Device Protection.
Note: Stolen Device Protection is not yet available on iPad or Mac.
Turn on Stolen Device Protection on iPhone
1) Open the Settings app.
2) Scroll down and tap Face ID/Touch ID & Passcode. Now, enter your iPhone passcode to get in.
3) Scroll down and tap Stolen Device Protection.
4) Turn on the switch for Stolen Device Protection.
5) Now, choose if you’d like your iPhone to honor the one-hour security delay only when you are away from familiar locations or make you wait for an hour at all times.
Obviously, the ‘Always‘ option is more secure, but it means you will have to wait for an hour even when you try to make the above-mentioned changes when you are home,
If you change your mind, follow the above steps to turn off Stolen Device Protection. Note that you must turn it off before you sell, trade-in, or give away your iPhone.
What happens next?
Your iPhone will now require facial or fingerprint authentication before letting you or someone else access some sensitive information.
Secondly, when you or someone else tries to make a change to a setting that is secured by Security Delay at an unfamiliar location, then you or that person will have to start the one-hour countdown timer. For instance, if I go to change my iPhone passcode from a new location, it will ask me to Start Security Delay. Once I tap the button, it will run a 60-minute timer in the Time Remaining section.
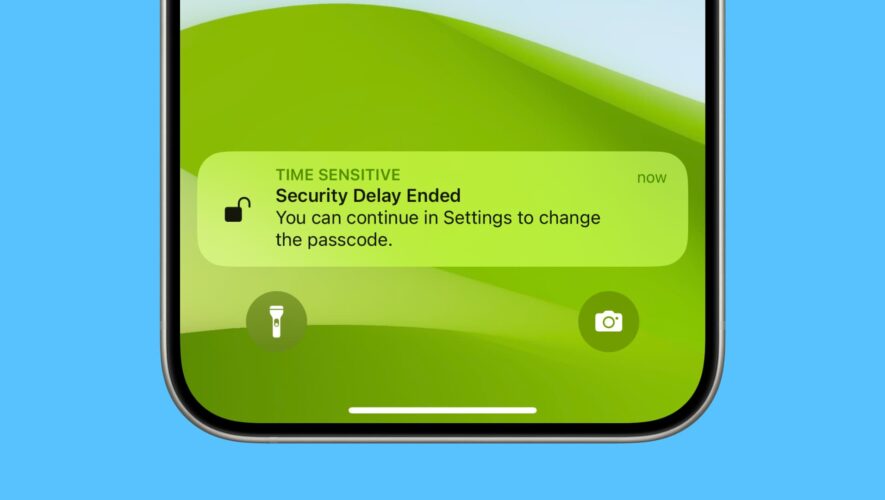
After the one-hour period ends, the iPhone will notify me, and then I can change the passcode, provided I authenticate again with my face.
Is all my data safe because of Stolen Device Protection?
If an unauthorized person does not have access to your iPhone passcode, almost all your data inside is safe. To take it to the next level, learn how to secure your iPhone Lock Screen notifications.
If the thief knows your iPhone passcode, Stolen Device Protection will prevent them from doing big damage, like changing your Apple ID password, erasing your device, accessing your account passwords, and such. However, they can still look at your photos, go through notes, see your messages, access your contacts, make calls from your iPhone, and all that.
VIDEO
On a related note: How to keep your Apple ID and iCloud ID secure
iDownloadBlog.com
How and why to enable Stolen Device Protection on your iPhone


